
- Feature
- Posted
Peaky blinder
From frozen tea to thermal bliss: energy specialist Esmond Tresidder transformed his leaky 1970s Highland home into one of the highest performing retrofits ever featured in these pages, combining academic knowledge with hands-on retrofit innovation to create a comfortable, healthy family haven with breathtaking views of Ben Nevis, proving that even Scotland’s most challenging climates are no match for passive house principles.
Click here for project specs and suppliers
Development type: 84 m2 timber frame house built in 1975 extended to 102 m2.
Method: House renovated with extensive use of woodfibre insulation, airtightness measures, mechanical ventilation with wastewater heat recovery, and an innovative air-to-air heat pump system.
Location: Rural Fort William, Inverness-shire
Standard: Enerphit plus certification pending
Space heating cost: £175 per annum, averaging at £14.58 per month.
(see In Detail panel for a detailed breakdown)
With stiff fingers I bring the bike to a stop, swing my leg over the back wheel and push it up the drive to our house. I’m spent. For the last hour I’ve been slightly too cold, only able to maintain my temperature by cycling hard, but the harder I cycle the more the wind chills me. I’ve only been able to get comfortably warm when cycling uphill. Hunger, fatigue and cold have been gnawing at me. I drop the dirty bike at the top of the drive, a problem to be dealt with later, and hobble onto the porch, taking off my wet shoes and icy socks.
I open the door to our house. As I step through, I’m enveloped in calm warmth, my mind relaxes, knowing that I’m not warm yet, but I soon will be. As the hot water of the shower washes over me I reflect on how unlikely this all seems. A house that two years ago was cold, drafty, damp and expensive to keep that way is now a haven of comfort and has just achieved the lowest heating costs of any home in the UK monitored by heatpumpmonitor.org.
Before starting this project I had spent the previous fifteen years learning and thinking about low-energy buildings, first academically, then professionally. But my theoretical knowledge was not matched by anything practical – I had precious little hands-on experience. I didn’t even like DIY.
Having a deep theoretical understanding of the problems with most houses and how much healthier and more comfortable they can be through good design created a cognitive dissonance because of my own living situation. I knew the projects I was working on – social housing, schools and leisure centres, all to the passive house standard – would be super comfortable and healthy buildings with radically lower running costs than conventional buildings, yet I was working on them from a freezing shed and living in a cold and damp house. Completing the AECB retrofit course in the first year we were here opened my eyes to the potential for deep retrofit, and I started to wonder what could be done with our house.
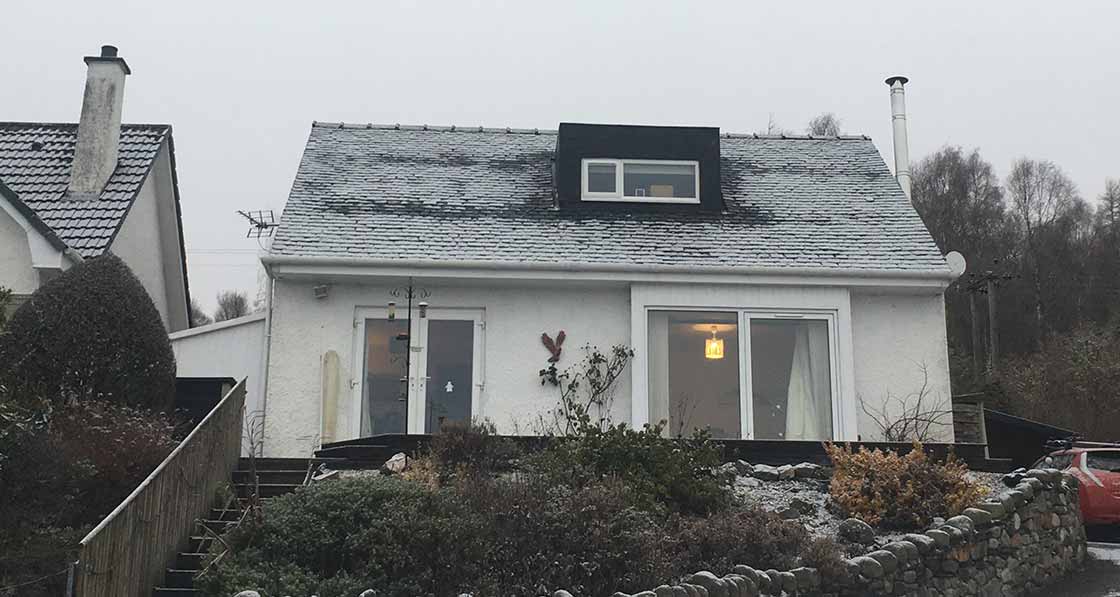
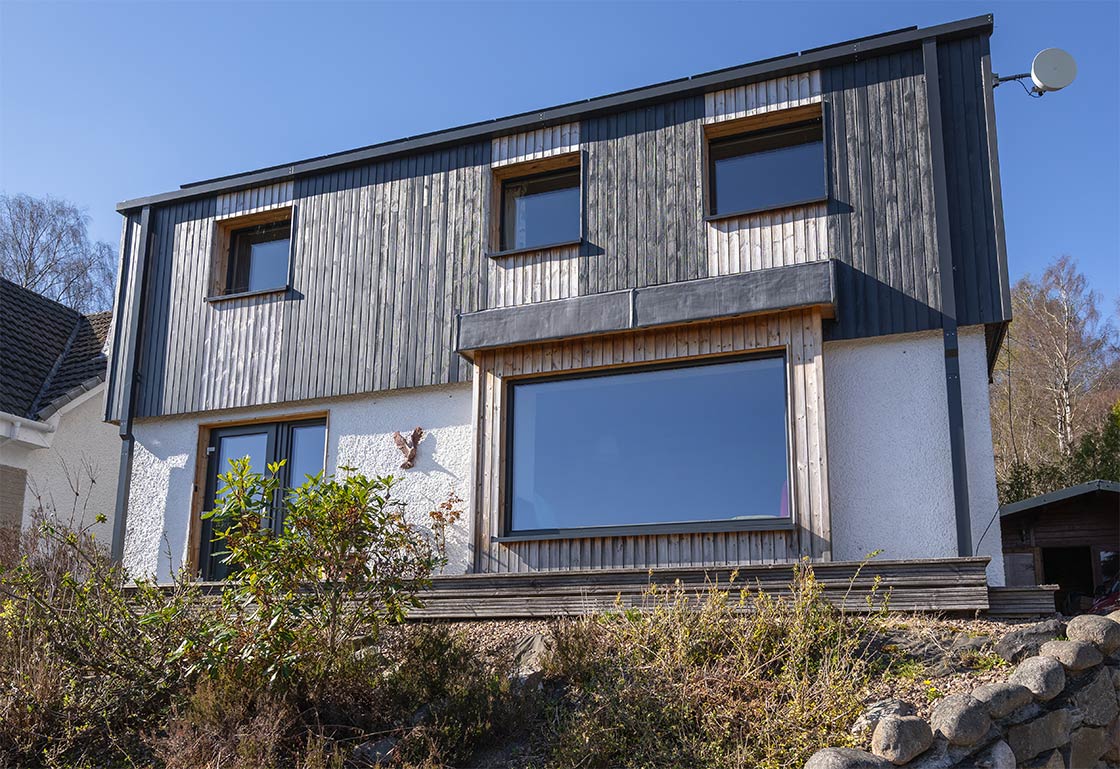
Before and (below) after
This article was originally published in issue 50 of Passive House Plus magazine. Want immediate access to all back issues and exclusive extra content? Click here to subscribe for as little as €20, or click here to receive the next issue free of charge
We moved from Brussels to Lochaber, in the Western Highlands, in 2016. Finding the right house had been difficult and we settled for something that we knew would soon be too small – we were hoping for a third child – because of its fantastic location. The house looks onto Britain’s highest mountain, Ben Nevis, is within walking distance of schools, on a safe bike route into town and is five minutes’ walk from a train station. We were excited to swap the city for the mountains but didn’t want to become too dependent on cars, having enjoyed not owning one in Brussels, so the location suited us perfectly.
Our house, apart from its location and view, was unremarkable. Built in 1975, a timber frame provided the structure with white rendered blockwork keeping the worst of the weather off. Upstairs the rooms were ‘in the roof’ – the house was one and a half storeys high, with a couple of dormers to increase the usable space. This type of modern timber frame housing is ubiquitous in this part of the world.
With my curiosity piqued by the AECB course I started poking around our house. Under the carpet and floorboards, the suspended floor had no insulation at all. The loft and walls were not much better, with just a token 15 mm of glass wool insulation between the structural timbers. The windows were relatively recent UPVC double glazed but leaked badly around the frames. After a lot of deliberation we decided to go for a retrofit, and to target Enerphit certification as the outcome.
Before starting we had an airtightness test to establish the pre-retrofit airtightness. When the house was depressurised all the carpets lifted as air poured in between the floorboards. The tester had to admit defeat and couldn’t give a more accurate answer than more than 15 air changes per hour – our house was so leaky that the fan wasn’t big enough to maintain the 50 pascal pressure differential required for the test.
This fitted with our lived experience of the house. In cold weather it was uncomfortable – too hot close to the radiators and too cold everywhere else – and in hot, sunny weather the bedrooms upstairs remained unpleasantly hot well into the night. The oil cylinder feeding our old boiler needed refilling more often than either our finances or carbon conscience were comfortable with. While I didn’t know of any examples of deep retrofit on modern timber frame houses, Chris Morgan’s excellent book ‘Sustainable Renovation’ had a couple of suggested details for how it might be done. These were my starting points. I started by thinking about insulating externally.
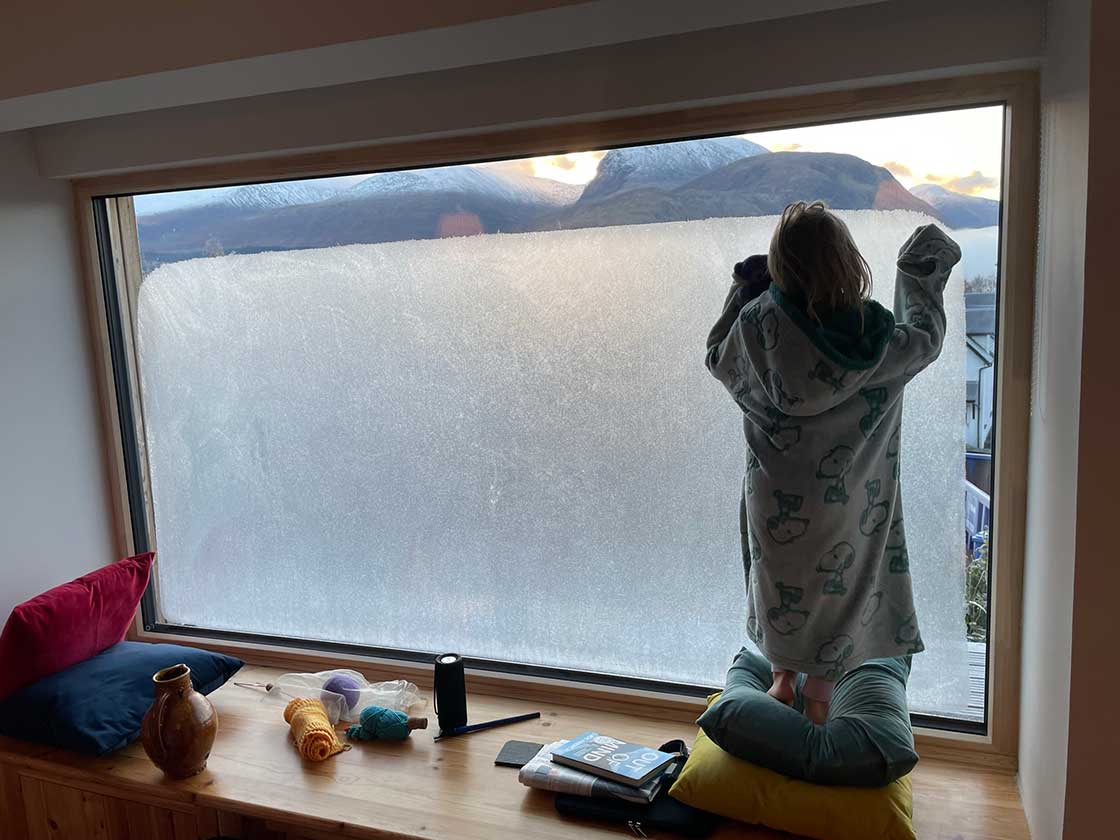
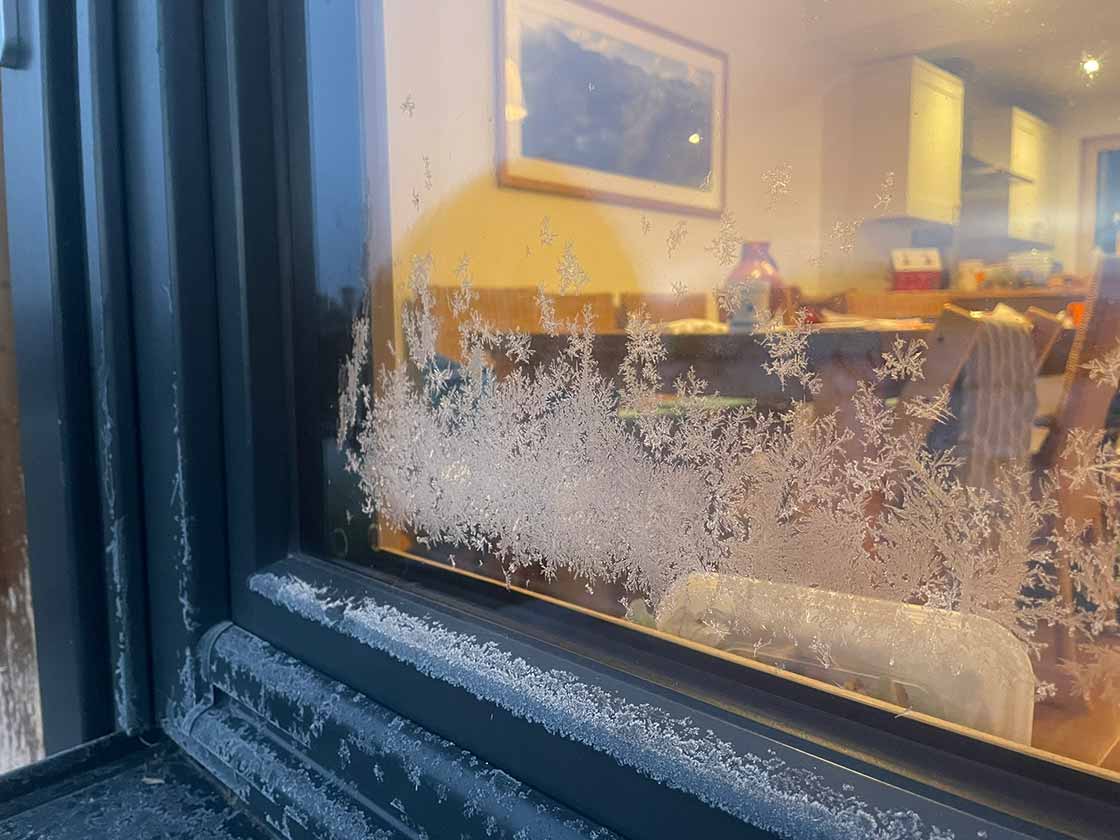
(bottom to top) With triple glazed windows from 21 Degrees sitting in an insulated, airtight envelope, frost forms on the outside of the window; one of the Tresidder children attempts to peer over an ice layer on the window, standing barefoot, inches from the cold; the family cat surveying a winter landscape in the comfort of the window seat.
Doing this outside the existing blockwork looked risky in terms of thermal bypass, thermal bridging and moisture, and removing the existing blockwork to insulate directly outside the timber frame came back with a whopping price tag from the contractor. I decided that insulating the walls from the inside was something I could largely do myself and I came up with a strategy – removing the plasterboard, removing the existing insulation then adding insulation between the studs, followed by tongue-andgroove woodfibre insulation board inside the studs, a vapour-control membrane and a service cavity to protect the membrane and allow easy running of electrical cables and hot water pipework around the house.
As I removed plasterboard from each room the extent to which moisture was a problem became clear; much of the insulation was covered in black mould. This was especially the case around electrical sockets where the air could more easily leak into and out of the walls, bringing with it moisture when going from the room and no doubt mould spores when coming into the room. This vindicated my decision to do a really good, moisture-robust job.
We used natural insulation throughout. This choice was partly to do with minimising moisture risk and partly because they are nicer to work with, but I also had half a mind on embodied carbon with every choice we made. I didn’t model the embodied carbon because in most cases our choices were simple and the lowest embodied carbon choice was relatively clear, but on a project with more complicated decisions this would certainly be worthwhile.
Our floor joists were 180 mm deep. In order to meet the U-value requirements of the Enerphit component method I needed to add more insulation below the joists as well as between them.
I developed a detail where I extended the joists by 100 mm using pieces of ply, and then suspended a windtight, vapourpermeable membrane between these to create an enclosed space, protected from wind-washing, that I could add insulation to.
The resulting space under and between the joists was quite a complex shape, so I used loose woodfibre insulation that could be packed into every nook. On top of the joists I fitted a vapour-barrier membrane to act as the airtightness line, and this was taped to the membrane in the walls. Continuing the airtightness line through internal walls was a challenge that required quite a lot of figuring things out on site, but generally I passed the membrane under the walls where I could and taped to the sole plate where I couldn’t.
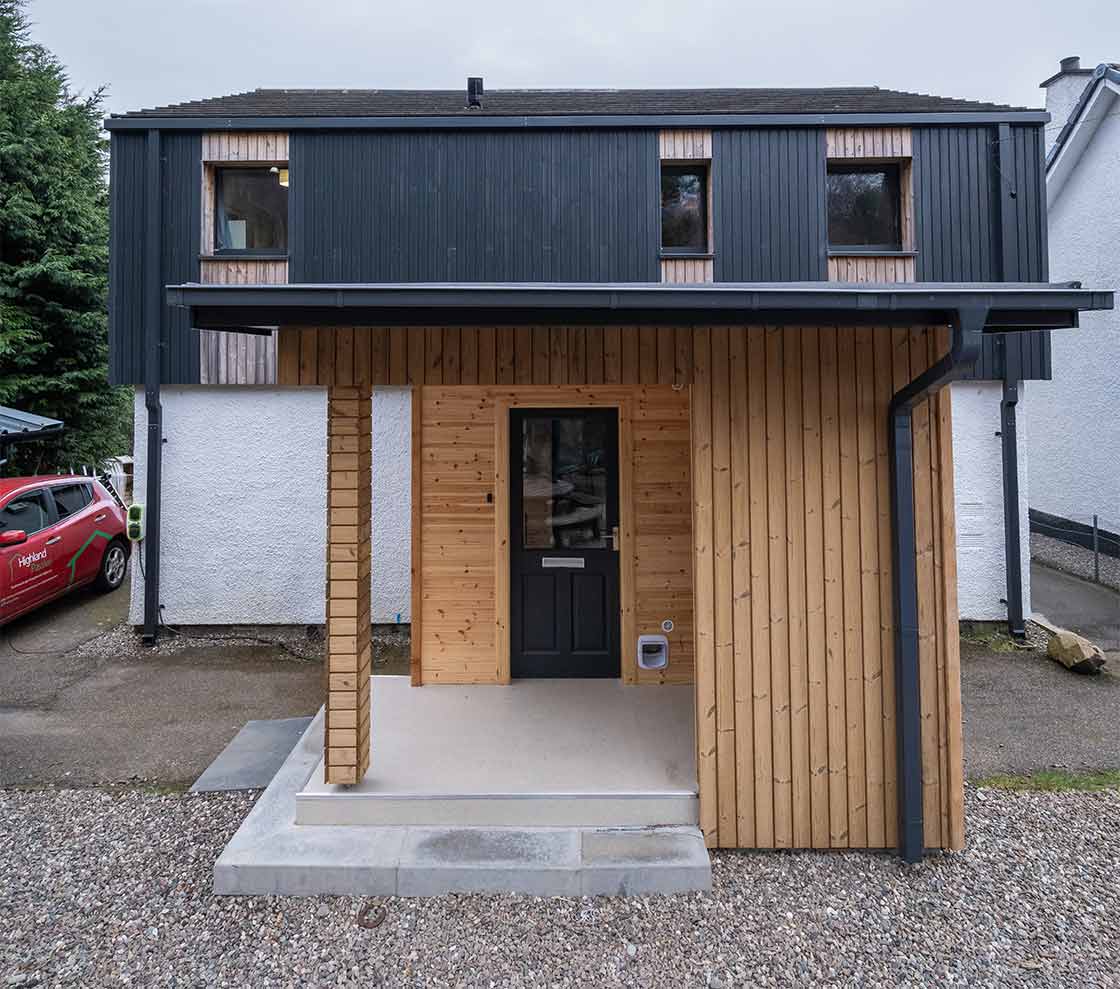
We knew that if we were going to stay in this house we needed more space – we only had three small bedrooms; our two boys were sharing a small room and our daughter had the small central room in the dormer. We considered various options for adding more space – extending out to the side into the driveway or out the back into the garden, but none of these seemed to work very well in terms of the layout of the house, and didn’t solve the problem that the existing rooms were small. Given that we were going to have to do radical things upstairs to improve the thermal performance we started to consider doing something really radical and completely rebuild the first floor as a full-height floor. The first floor in 1.5 storey houses loses a significant amount of space at the eaves, and by rebuilding to full height, or nearly full height, we could win extra space.
Outside view
Having the house at similar temperatures all summer, whether the weather is cool or warm was a luxury I hadn’t appreciated until living it.
We had brought in John Gilbert Architects to help with the architecture side of things, and by now I was also working full time for them as an energy specialist. Drew Carr was the project architect and brought an understanding of how to make the best of the building layout that I just didn’t have. He also brought a keen sense of aesthetics, and without him our house might have functioned very well – but looked terrible. He suggested rebuilding the first floor with a shallower pitch on the roof to allow higher eaves without raising the height of the ridge beyond the height of neighbouring buildings. After some back-and-forth the result was a design with three reasonably sized bedrooms for the kids, a much bigger bedroom for us parents and a bigger bathroom. We even gained enough room for a new en-suite shower and a home office.
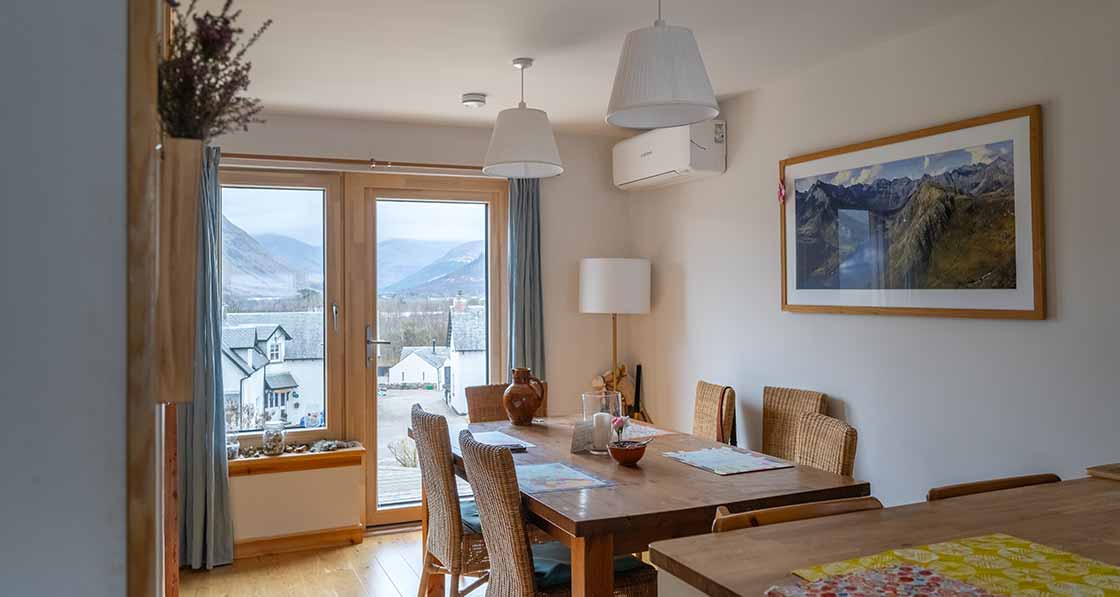
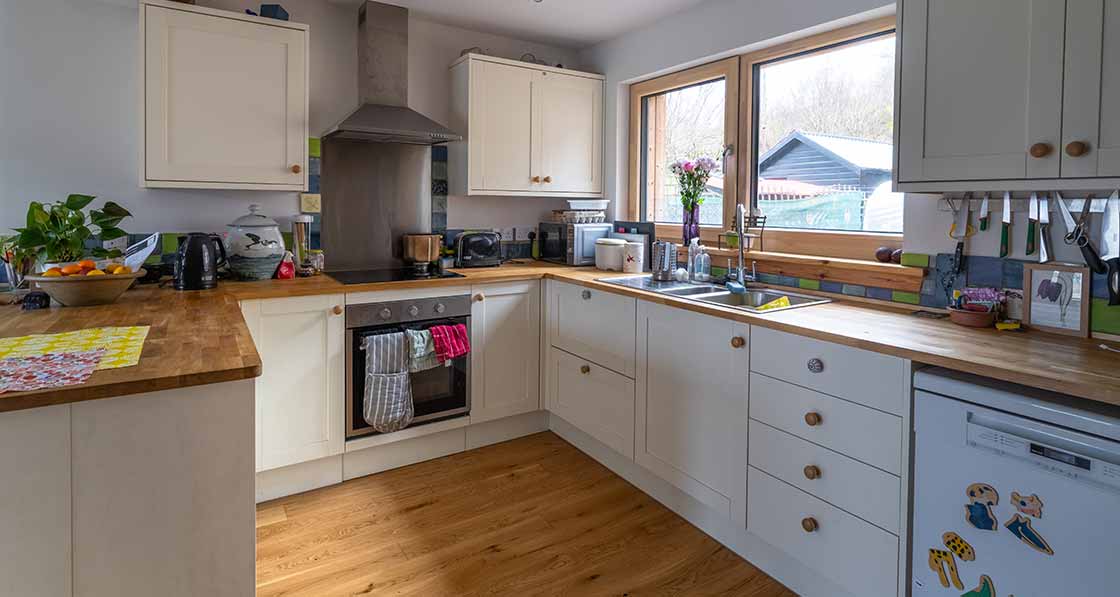
Drew also helped us improve the spaces on the ground floor; making the kitchen open plan with the dining room and making a separate utility room where we could hide hot water and ventilation plant as well as dry clothes and store an ever growing array of kit for biking, running, skiing and climbing.
Because the upstairs was new we were able to build really high performance walls and roof – deep I-joists filled with blown-in insulation and with airtight board on the inside – essentially how I would build a newbuild passive house, but built on top of our ground floor walls. The connection details needed a lot of thought to get them to work structurally while maintaining airtightness and insulation continuity.
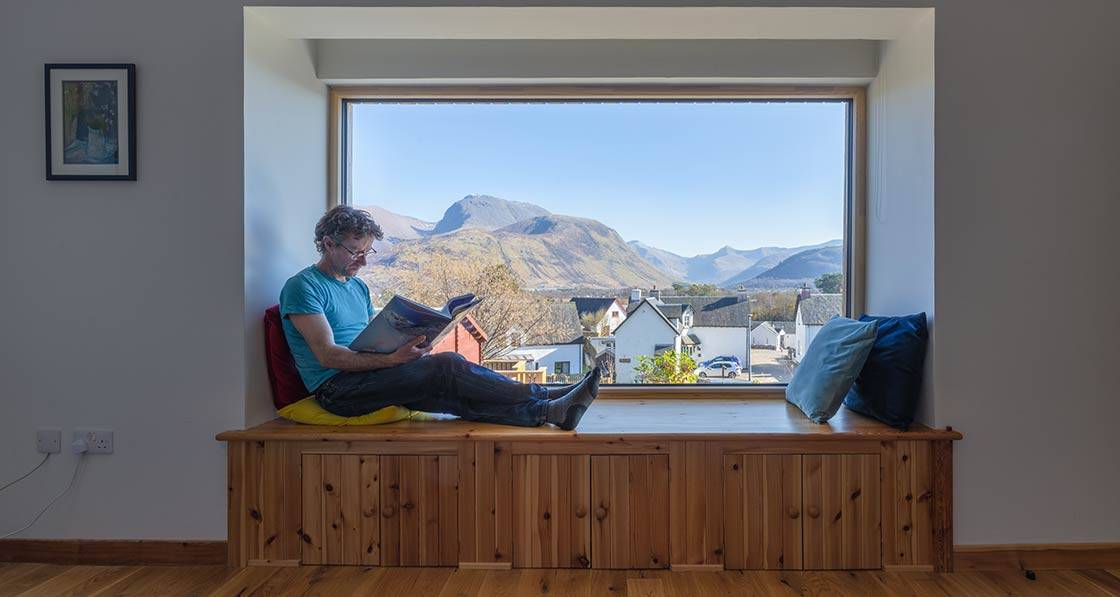
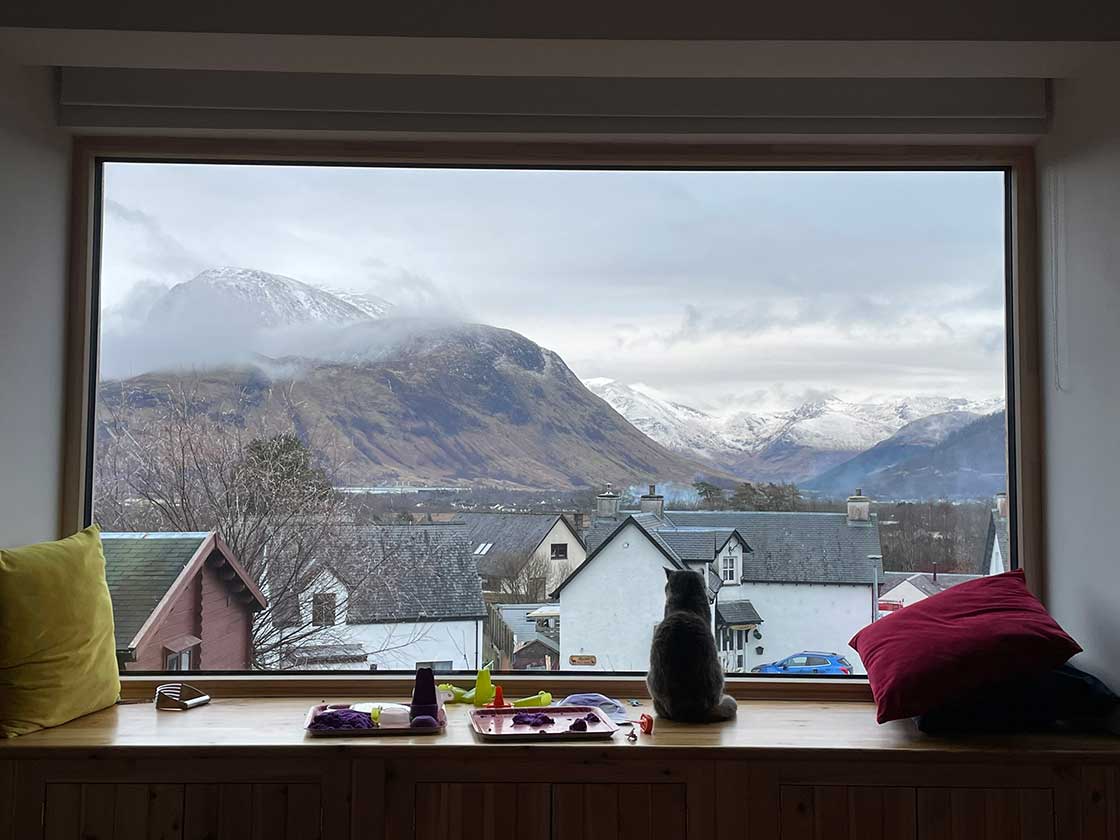
Downstairs we were able to make some improvements to the window layout, the biggest of which was in the living room. Previously we’d had a large sliding door opening onto timber decking to the south, meaning the room quickly got too hot in sunny weather and the centre mullion of the sliding doors split the fantastic view of Ben Nevis right down the middle. We replaced this with a fixed window the same width but 400 mm less tall and with a window seat below.
-
 No insulation or draught proofing under the floorboards makes for chilly feet
No insulation or draught proofing under the floorboards makes for chilly feet
No insulation or draught proofing under the floorboards makes for chilly feet
-
Sealing the edge of the window cills to keep wind and water tight before cladding goes on
Sealing the edge of the window cills to keep wind and water tight before cladding goes on
-
Taping and duct insulation for the supply and extract to the MVHR
Taping and duct insulation for the supply and extract to the MVHR
-
Ducts labelled at manifold in case of future cleaning and maintenance needs
Ducts labelled at manifold in case of future cleaning and maintenance needs
-
Outdoor unit of the Mitsubishi air-to-air heat pump
Outdoor unit of the Mitsubishi air-to-air heat pump
-
The heat pump indoor unit with warm and cold refrigerant pipes running to it
The heat pump indoor unit with warm and cold refrigerant pipes running to it
-
7 cm2 hole from the heat pump (£6 a year in heating costs) and a big impact on comfort if sat near this hole on a cold windy day
7 cm2 hole from the heat pump (£6 a year in heating costs) and a big impact on comfort if sat near this hole on a cold windy day
-
A heat pump water heater draws heat from indoor air, its load reduced by waste water heat recovery and aerated shower heads
A heat pump water heater draws heat from indoor air, its load reduced by waste water heat recovery and aerated shower heads
-
Joists extended beneath to reduce thermal bridging, with windtight membrane pinned to joists and loose fill insulation
Joists extended beneath to reduce thermal bridging, with windtight membrane pinned to joists and loose fill insulation
-
Airtight membrane to floor
Airtight membrane to floor
-
Existing blockwork rainscreen and timber frame extension
Existing blockwork rainscreen and timber frame extension
-
Existing timber frame ground floor wall fitted with 100 mm Thermojute insulation
Existing timber frame ground floor wall fitted with 100 mm Thermojute insulation
-
Airtight layer on ground floor with service void
Airtight layer on ground floor with service void
-
Airtightness detailing at first floor joists
Airtightness detailing at first floor joists
-
Finsa Vapourstop board serves as AVCL in the first floor. Note tapes over drill holes for cellulose insulation.
Finsa Vapourstop board serves as AVCL in the first floor. Note tapes over drill holes for cellulose insulation.
-
22 mm Gutex Multiplex Top sheathing board
22 mm Gutex Multiplex Top sheathing board


https://mail.passive.ie/magazine/feature/peaky-blinder#sigProIdc469c29db9
This change reduced the overheating risk to this room (because the window is less tall) and significantly improved the view. Since this window is in a bay that projects out a small distance from the front of the house it gives a large and very popular window seat – effectively giving us an additional sofa in a part of the room that was little used before because it was either too hot in the sun or too cold at any other time. We also added an opening window to the east in this room to even out the light and to allow extra ventilation in summer or if we have a lot of guests.
The other opening on to the decking was a double door from the dining room. We replaced this with a single door and an opening window to the side. This reduced the total amount of glazing, reducing the overheating risk in sunny weather and giving us a window that can be left open overnight during hot weather. All other windows downstairs were kept the same size but replaced with beautiful triple glazed timber windows from specialist passive house supplier 21 Degrees.
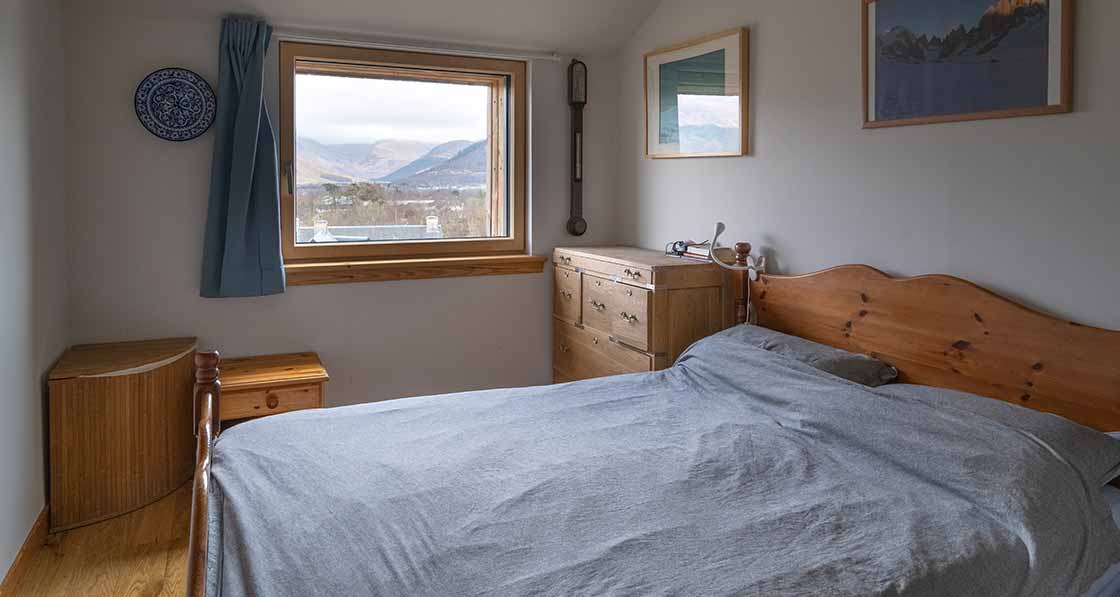
Upstairs we had a clean slate in terms of windows, and were able to make the most of the previously neglected views to the south and north. Set in deep reveals these windows perform brilliantly – harvesting the low winter sun and keeping the high summer sun out.
The MVHR was designed and commissioned by Paul Heat Recovery Scotland, who did an excellent job, but I did the install myself. We used semi-rigid radial ducting and were able to do a minimal amount of boxing out for ducts, manifold and silencers.
For the heating I took a novel approach, using a simple and very cheap air-to-air mini-split heat pump (aka an air conditioner) to supply heat to the dining room, with no heating in other rooms. The ground floor is relatively open plan, and a bit of modelling suggested that other rooms would get enough heat through internal doors most of the time. I planned for occasional back up heat from local plug in heaters if this was ever a problem.
This approach came about initially because when I spoke to a local heat pump installer I could not convince them that the heat load of the house would be below 5 kW (the size of the smallest air-to-water heat pumps), let alone the 1.5 kW the PHPP was suggesting. Mindful of how important sizing is to heat pump performance I started looking at alternatives. I also liked the idea that the radical things we had done to the fabric and ventilation of the house would allow us to save money on the capital cost of the heating system. The air-to-air minisplit ended up costing us £1,500 installed, a big saving on the typical cost of an air-to-water heat pump, even when factoring in that we had to make separate provision for hot water.
For hot water we went for a hot water heat pump – an insulated hot water cylinder with a small heat pump sitting on top. Typically, these are ducted to the outside and use outside air as their heat source, but we have ended up using the indoor air as our heat source. This decision also came about serendipitously – I had cored the holes for our MVHR supply and exhaust ducts in our concrete blockwork walls and my shoulders were keen that I didn’t do any more of this sort of work unless absolutely necessary. I decided there were potentially some other advantages to having the hot water heat pump stealing heat from the house and that we’d run the house for a trial period like this – I could always core some more holes if it didn’t work well. A centrally located hot water cylinder with radial 10 mm copper pipework minimizes distribution heat loss and provides quick hot water delivery due to low pipe volume, though it requires good mains pressure.
Both showers are on the first floor, close to each other, meaning we could route the wastewater from these through a vertical wastewater heat recovery device. This reduces energy demand for showering by about 50 per cent and also meant we were able to go for a smaller (and cheaper) hot water cylinder.
We’d already lived in the house for a few months when we got the airtightness tester back in for the post-retrofit test. Usually, an interim test is a good idea to help identify and fix leaks before the airtightness line is covered up, but this wasn’t possible due to the sequencing of the project – the airtightness measures in some areas were covered up long before other areas were ready for testing. Having lived in the house we knew it performed, but I was still a little anxious that we would miss the Enerphit requirement. The final result came in at 0.46 air changes per hour, more than thirty times more airtight than the pre-retrofit house and comfortably under the Enerphit requirement of no more than 1 air change per hour.
INDOOR ENVIRONMENTAL QUALITY (IEQ)
Air quality context: Rural site, quite close to quite a busy road but generally not that polluted. Sometimes need to keep windows closed due to neighbours’ oil boilers and wood/coal stoves. Very occasionally have to keep windows closed because of midges! Mostly we’re lucky enough to be able to open them whenever we want.
Air quality index: Fair (an annual average score of 21 AQI, based on Fort William, using the Plume Air Quality Index – with a figure of 56 AQI (poor) at the time of writing.
Overheating: Based on PHPP calculations, 1 per cent of year above 25C even without window opening (conservative test); 0 per cent allowing for some window opening. In practice it works well, and we do some window opening at night during heat waves.
IEQ monitoring results: Summary: temperatures and relative humidity are being monitored. Initial results from November 2024-April 2025 are presented here. CO2 and PM2.5a are not being monitored, nor have radon been assessed.
Living room: Average temperature: 20.3C. Percent of period above 25C: 0% (no summer monitoring yet); percent of period above 22C: 3%; percent of period below 19C: 5% (these will almost exclusively be overnight when the room isn’t in use). Relative humidity: Average of 47% (minimum 32%, maximum 65%)
Master bedroom: Average temperature of 19.2C. Percent of period above 25C: 0% (no summer monitoring yet); percent of period above 21C: 1%; percent of period below 18C: 7%; percent of period below 17C: 0.4% (these temperatures are comfortable for us for a bedroom. If we wanted warmer temperatures then we’d have to use some local plug-in heaters). Relative humidity: Average of 49% (minimum 38%, maximum 64%)
Dining room/kitchen (open plan): Average temperature: 19.9C. Percent of period above 25C: 0% (no summer monitoring yet); percent of period above 22C: 0%; percent of period below 18C: 0.8% (these will almost exclusively be overnight when the room isn’t in use). Relative humidity: Average of 49% (minimum 34%, maximum 67%)
Having lived back in the house for two years now it is everything we hoped it would be and more. Even as someone who spends their working life thinking about building performance I have been surprised by things.
On the very first night I had a shower and hung the wet towel up, struck by a moment of doubt – how would the towel dry with no radiator and no direct heat in the room? In theory I knew that a high ventilation rate at 20C would dry it well, but my lived experience of houses here made it seem impossible; We live in one of the wettest places in the UK, almost every house here has a dehumidifier or a mould problem. Many have both. The next morning the towel was bone dry.
We expected the house would always be a nice temperature and it is, that drying out laundry and the endless wet kit from kids and adults sports would be much easier and it is, but things we hadn’t thought of surprised us often early on, and continue to occasionally; the window above the kitchen sink not steaming up when you drain pasta, the timber kitchen worktop still looking good, even around the sink where it’s constantly getting wet, because it doesn’t stay wet, my sense of smell becoming more sensitive because the air in the house is cleaner than outside, having to come back into the house to fetch a coat before the school run because you hadn’t realised how cold it was outside. Bedding feels much fresher than before, the house is beautifully quiet at night or when the neighbours are strimming the garden.
In summer the bypass on the MVHR automatically adjusts the amount of heat recovered to keep the house at the target temperature. This was something I hadn’t considered – normally I would turn the heating off in the spring and put up with whatever temperatures the house ended up at, often slightly chilly during cooler weather.
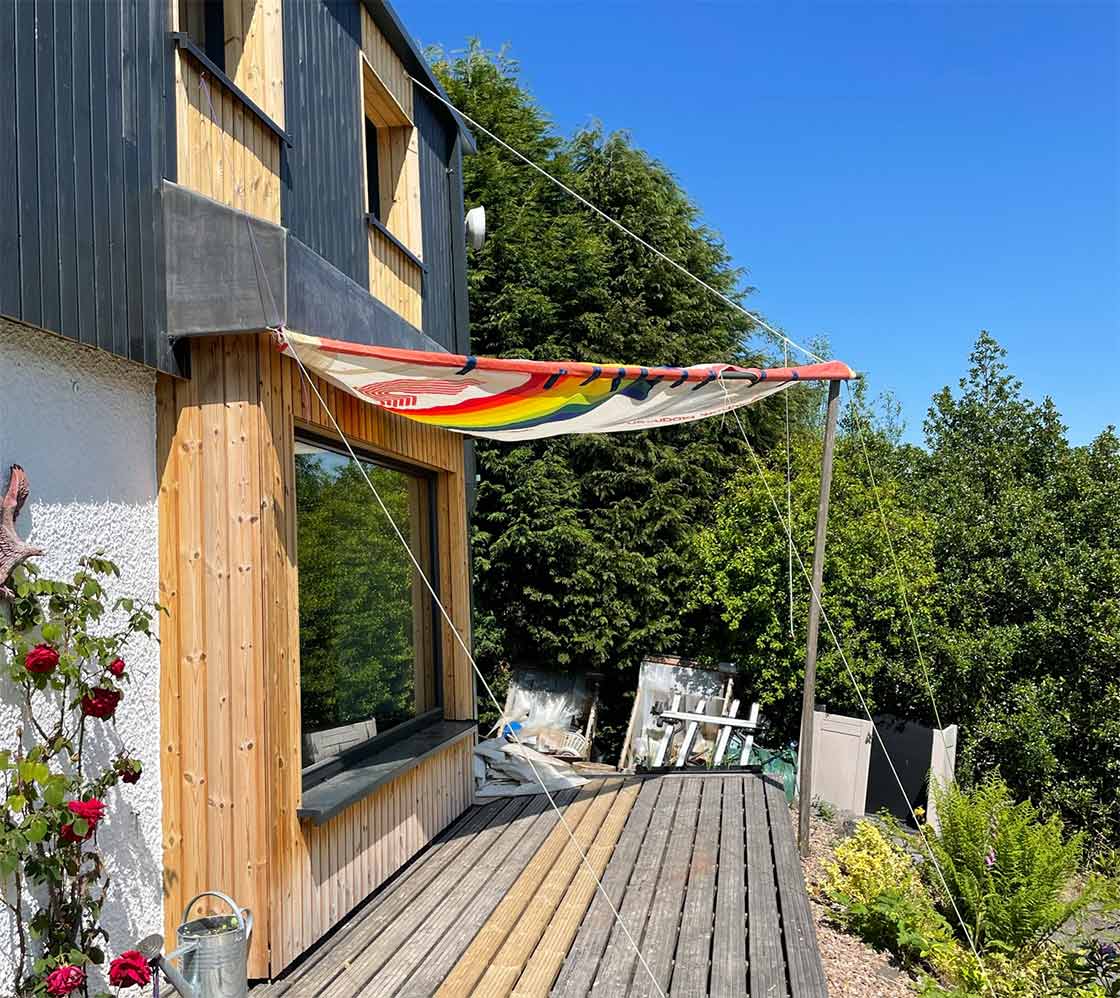
Having the house at similar temperatures all summer, whether the weather is cool or warm was a luxury I hadn’t appreciated until living it. We’ve had two significant heat waves since moving back in. As predicted by modelling the house performs very well in these, but does need some temporary shading over the large living room window to avoid that room getting too warm. For now, I’ve a home-made shade from a friend’s old windsurf sail, and I’ll probably get a proper one made in due course. With this in place the house has stayed at 22 or 23C with outdoor temperatures of 28C and lots of sun. In these conditions walking into the house feels remarkable – like walking into an air-conditioned space.
Comfort shock
We’d previously run our house as cold as we could tolerate in the winter because of concern about climate change, and it took a while to get used to having a warm house. It felt so profligate to always have the house at a nice temperature, and we had a hard time trusting the modelling that even at comfortable temperatures the energy use would be very small. Once I had separate monitoring of the heat pump energy use we were able to relax a bit – the electricity use really was tiny. Our total cost for heating and hot water was just £175 for the first 12 months of monitoring. In the middle of an energy price crisis our heating and hot water was costing us less than half the cost of our internet connection.
The air-to-air heating has mostly worked very well. Delivering heat to a single room does mean that we need to remember to leave internal doors open during the day for those rooms to get sufficient heat. Closed doors overnight mean the bedrooms are typically a degree or two cooler than downstairs where the heat is being delivered. This works well for us as we prefer the bedrooms a little cooler (as do many people) and also means we can slightly overheat the downstairs on cheap overnight electricity to reduce the heating demand during the day, without causing discomfort while we’re sleeping. At very low loads the air-to-air heat pump cycles, and I’m working on a fix for this, but otherwise we’ve been very happy with it and haven’t needed an additional heat source in other rooms.
Perhaps atypically for a passive house project, we didn’t aspire to a picture perfect, grand designs style of house. Instead, we wanted something highly functional, big enough for while the kids live here but not so big that we’ll be rattling around when they fly the nest. A home that could serve as a super comfy, healthy, happy springboard from which we could enjoy adventures on our doorstep and further afield. Two years in, our house is lovely but often scruffy; well lived in and well loved. My hope for its future is that what we’ve done to the fabric will mean that it not only continues to perform excellently but will be enough that it outlives us and can be similarly cherished by future families. More broadly, however, I hope our experience demonstrates that achieving significant energy efficiency and comfort in existing homes, even in challenging climates, is not only possible but realistic.
Much has been written and said about how challenging and expensive deep retrofit is. While this project hasn’t been cheap, the big expense was rebuilding the roof and first floor. The retrofit work on the ground floor, the airtightness detailing throughout the house and the MVHR installation were all done by me, a previously unskilled and reluctant DIYer. Without the new upstairs the majority of the work would have been done by me. Such an approach offers a route to radically better building performance without breaking the bank. I think this approach is particularly applicable to timber frame houses where the skills needed are relatively easy to learn. At the very least, doing it yourself has the advantage that – if you take it seriously – you are guaranteed a good job. More than that, though, I hope the project demonstrates that a combination of DIY enthusiasm and expert guidance could help accelerate the roll out of deep retrofit for timber frame houses, and this is the direction I’m taking for my own consultancy work.
Selected project team members
Client & energy consultant: Esmond Tresidder
Architect: John Gilbert Architects
Civil / structural engineer: ADAC-structures
Main contractor: Michael Faryma Joinery
Insulation, airtightness products & thermal breaks: Ecological Building Systems
Windows and doors: 21 Degrees (formerly Green Building Store)
MVHR: Paul Heat Recovery Scotland
Mechanical contractor: KS Refrigeration
Electrical contractor: IES electrical
Airtightness tester/consultant: Skye Designs
Passive house certifier: WARM
Cladding supplier: Russwood
Photovoltaic supplier: AES solar
Lighting: IES
Project overview
Building type: 1975 timber frame house, 3-bedroom and 84 m² TFA pre-retrofit; 4-bedroom and 102 m² TFA post-retrofit.
Site type & location: Rural site, near Fort William, Inverness-shire.
Budget: N/A
Completion date: January 2025
Number of occupants: 2 adults & 3 children
Passive house certification: Enerphit plus certification pending.
Space heating demand: Before: 343 kWh/m²/yr with an average internal temperature of 17C. After: 35 kWh/m²/yr with an average internal temperature of 20C.
Heat load: Before: 122 W/m² at an average internal temperature of 17C. After: 12 W/m² at an average internal temperature of 20C.
Primary energy renewable: Before: 900 kWh/m²/yr After: 29 kWh/m²/yr
Energy performance certificate (EPC): Before: D 57 After: Haven’t had it reassessed.
Measured energy consumption: Before: Estimate of £1,200/yr for heating and hot water for a house that was unpleasantly cold all winter, based on our typical oil usage of 1,100 litres per year plus electricity for showers. After: 1,100 kWh of electricity for all space and water heating (November 2023 to November 2024). This gives 10.8 kWh/m2a electricity use for heating and hot water. Total cost £175.
Energy costs: Before: Estimate of £1,200 a year for all heating, plus household and car charging electricity use. After: £1,045 for all electricity (June 2023 to June 2024) including all heating and electric car charging. We expect this to drop to approximately zero now that we have PV.
Airtightness (at 50 Pascals): Before: More than 15 air changes per hour. After: 0.46 air changes per hour.
Thermal bridging: All junctions were designed to be as low thermal bridge as practicable. Insulation was carried into the reveals internally on the ground floor (retrofit walls) and externally, fully wrapping the Progression frames on the first floor (new build walls). There were some metal brackets going through the insulation in the new build part that we were able to mitigate through having woodfibre insulation board external to the structure. Y-value (based on ACDs and numerical simulations: not calculated yet. Will be doing as part of the final PHPP calcs.
Ground floor: Before: Concrete block rainscreen outside 50 mm ventilated cavity, then sheathing board, 100 mm deep timber studs with 15 mm of insulation, then foil backed plasterboard. U value 1.7 W/m²K After: Same concrete block rainscreen, ventilated cavity and sheathing board, then 100 mm of Thermojute insulation between studs, 12 mm of Elka strongboard for additional racking strength, 40 mm of wood fibre insulation board, then Intello airtightness membrane, 38 mm service void and 15 mm plasterboard. U-value: 0.26 W/m²K.
First floor extension walls: Thermopine timber cladding over ventilated cavity, then Pro clima Fronta WA breather membrane (wind-tight layer), 22 mm woodfibre sheathing board (Multiplex Top), 300 mm I-joist walls filled with Gutex Thermofibre (blown in), then Finsa Vapourstop board (airtightness layer and racking strength), 38 mm service cavity and plasterboard. U value 0.12 W/m²K.
Roof: Before: Sloped sections of roof with 15 mm mineral wool insulation, loft sections with same. U-value approx 1.6 W/m2K After: Cement tiles on battens and counter battens (ventilated beneath), then Solitex Plus (wind-tight layer), Elka Strongboard (racking strength), 350 mm I-joist roof filled with Gutex Thermofibre (blown in), then Finsa Vapourstop (airtightness layer and racking strength). Originally planned for 300 mm I-joists but structural engineer wanted deeper. U-value: 0.115 W/m²K
Porch: New porch walls are uninsulated stud walls with plenty of vents in them (this is an unheated space and not served by the MVHR, so need to make sure it’s sufficiently ventilated to avoid damp/mould problems). New porch roof is insulated with mineral wool, then breather membrane and a ventilated space before ply board holding the Resitrex flat roofing membrane.
Windows & doors: Before: Double glazed UPVC windows and doors. Estimated average installed U-value of 2.5 W/m²K.
New triple glazed windows: Downstairs: Green Building Store (21 Degrees) Ultra solid timber triple glazed windows and doors. Upstairs: Green Building Store (21 Degrees) Progression GRP/timber triple glazed windows. Overall average installed U-value 0.79 W/m²K (very good thermal bridging numbers, especially for the Progression windows).
Heating System: Before: Oil boiler on its last legs. Heat distribution via radiators. After: Mitsubishi air-to-air mini split heat pump delivering heat in the dining room. Other rooms heated by air moving between rooms through open doors.
Ventilation: Before: No ventilation system. Reliant on infiltration and window opening. After: Zehnder Q350 MVHR — Passive House Institute certified to have heat recovery efficiency of 90 per cent. External ducts kept very short and well-insulated. Water: 6l/min showers. Waste water heat recovery to both showers. 10 mm radial microbore distribution to minimise distribution heat loss.
Electricity: 6.4 kWp (31m²) Sunpower Maxeon array. Our current tariff is 9 p/kWh for 4 hours at night, 25p/ kWh the rest of the time and 15p for any electricity we export. We don’t have a battery since we’re already able to shift 60-70 per cent of our demand to the cheap tariff. Everything that we can shift to the 9p/kWh time we do (car charging, water heating, dishwasher, washing machine, slightly overheating the dining room in winter). Anything we can’t shift to night we try and run in the middle of the day when there’s likely to be solar generation, the rest of our solar we sell back to the grid. The PV has only been in since January, and March looks like the first month where our electricity bill will be approximately zero.
Sustainable materials: Insulation used was all natural: Thermojute batts, Gutex woodfibre boards and Gutex Thermofibre blown woodfibre insulation. All new timber was FSC certified.